반응형
1. Naver Developers 접속
https://developers.naver.com/products/login/api/
https://developers.naver.com/products/login/api/
developers.naver.com
1-1 오픈 API 신청

1-2 어플리케이션 등록


다운로드 URL의 경우 저는 임의로 아무 주소나 넣었습니다.
#URL Scheme 얻는법

2. Podfile 적용 및 구현

2-1 podfile 입력 후 저장 -> pod install

2-2 info-plist 작성

LSApplicationQueriesSchemes에서 두개 하위 리스트 생성 후 입력
2-4 URL Scheme 등록

2-4 AppDelegate 이동 import NaverThirdPartyLogin
- import NaverThirdPartyLogin
# AppDelegate 설정

#SceneDelegate 사용시(AppDelegate open url:에 쓰일부분을 여기에 써주시면 됩니다.)
- import NaverThirdPartyLogin

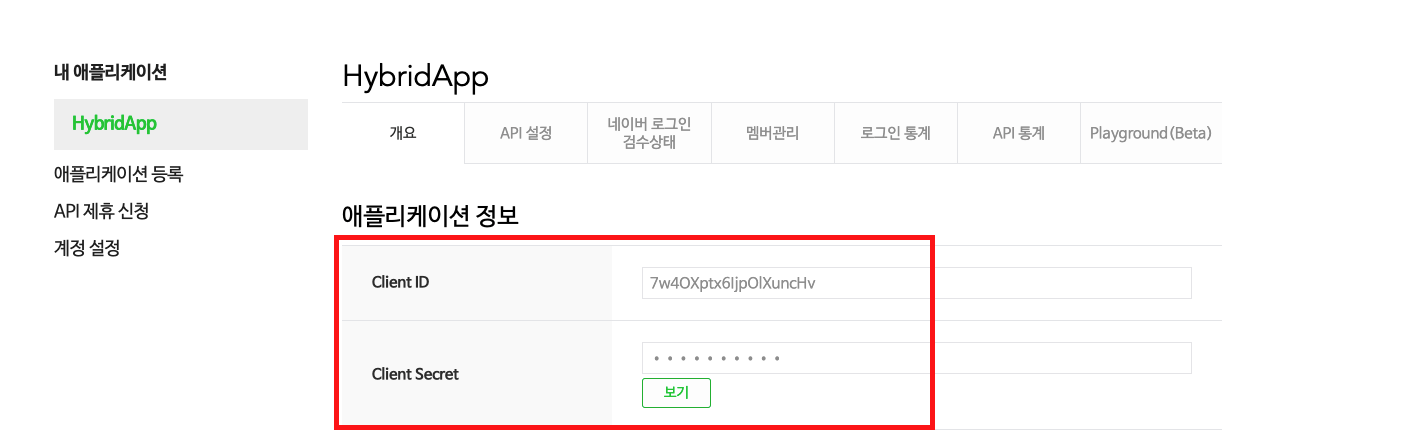
2-4 serviceUrlSchem, consumerKey, consumerSecret, appName 작성

2-5 NaverThirdPartyConstantsForApp.h 파일로 이동

마우스 오른쪽 클릭 후 폴더 열기 -> NaverThirdPartyConstantsForApp.h 더블 클릭-> define 되어 있는 정보를 변경


2-6 코드
(1) 호출코드
import NaverThirdPartyLogin
class ViewController: NaverThirdPartyLoginConnectionDelegate
## NaverThirdPartyLoginConnectionDelegate 함수 채택
extension LoginView: NaverThirdPartyLoginConnectionDelegate {
    func oauth20ConnectionDidFinishRequestACTokenWithRefreshToken() {
        print("토큰 요청 완료")
    }

    func oauth20ConnectionDidFinishDeleteToken() {
        print("네이버 로그인 토큰이 삭제되었습니다.")
    }

    func oauth20Connection(_ oauthConnection: NaverThirdPartyLoginConnection!, didFailWithError error: Error!) {
        print("error: ",error)
    }

    func oauth20ConnectionDidFinishRequestACTokenWithAuthCode() {
        guard let loginInstance = NaverThirdPartyLoginConnection.getSharedInstance() else { return }

        self.getNaverUserInfo(loginInstance.tokenType, loginInstance.accessToken)
    }

    func startNaverLogin() {
        guard let loginInstance = NaverThirdPartyLoginConnection.getSharedInstance() else { return }

        //이미 로그인되어있는 경우
        if loginInstance.isValidAccessTokenExpireTimeNow() {
            self.getNaverUserInfo(loginInstance.tokenType, loginInstance.accessToken)
            return
        }

        loginInstance.delegate = self
        loginInstance.requestThirdPartyLogin()
    }

    func getNaverUserInfo( _ tokenType : String?, _ accessToken : String?) {

            guard let tokenType = tokenType else { return }
            guard let accessToken = accessToken else { return }

            let urlStr = "https://openapi.naver.com/v1/nid/me"
            let url = URL(string: urlStr)!

            let authorization = "\(tokenType) \(accessToken)"

            let req = AF.request(url, method: .get, parameters: nil, encoding: JSONEncoding.default, headers: ["Authorization": authorization])

            req.responseJSON { [weak self] response in
                let decoder = JSONDecoder()

               print("response: ",response)
            }
        }
}
반응형
'Swift' 카테고리의 다른 글
| iOS 구글 로그인 (0) | 2022.02.27 |
|---|---|
| iOS 페이스북 로그인 (0) | 2022.02.26 |
| iOS 카카오 로그인 (0) | 2022.02.26 |
| FCM, APNS 연동 방법 (3) | 2022.02.25 |
| Firebase Dynamic Link (0) | 2022.02.25 |